iOS (Native)
Overview
The Appnomix Commerce SDK is a library designed to help brands deepen their relationship with customers by placing the brand prominently on the users' mobile phones.
Version 2.0 introduces significant enhancements including product detection, price comparison features, and a completely overhauled user interface. Version 1.0 focused primarily on coupon functionality.
On iOS, the SDK uses a Safari Web Extension to interact with web content in Safari browser. This requires users to enable the extension through Safari settings, which is handled by the SDK's onboarding flow.
Key Links
- Appnomix SwiftUI Sample
- For any questions regarding the integration, please contact [email protected]
Getting Started
Minimum Requirements
- iOS 15
- Xcode 15.4
Installing the SDK
- For Automated Xcode Setup refer to the simplified instructions available here.
- For Manual instructions follow the steps described below, organized into two main categories: Safari Extension target Add Safari Extension target and SDK configuration .
Safari Extension Target
1. Copy Safari Extension Template
Copy Appnomix Safari Extension template to your library.
-
Download the
Appnomix.Safari.Extension.xctemplate.zipfile from the assets of the latest release. -
Copy
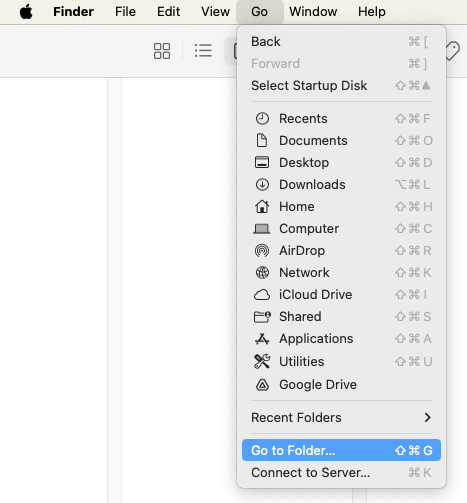
Appnomix.Safari.Extension.xctemplateinto theTemplatesfolder:- Open a new Finder window and navigate to the
Gomenu at the top of the screen. - Select
Go to Folder... - In the dialog box that appears, type
~/Library/Developer/Xcodeand press Enter.
- Create a new folder named
Templates, or select it if it already exists. - Extract the downloaded file and copy the
Appnomix.Safari.Extension.xctemplateto theTemplatesfolder.

- Open a new Finder window and navigate to the
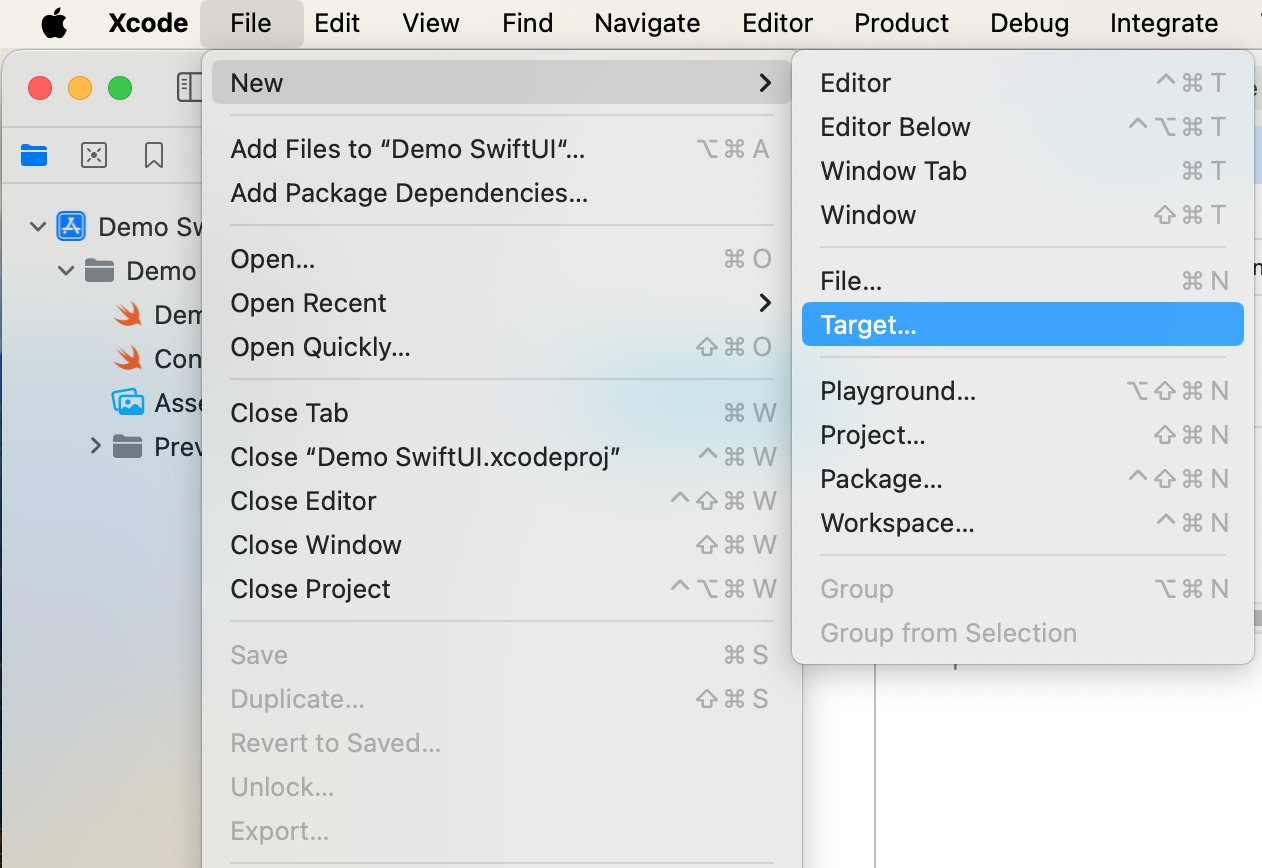
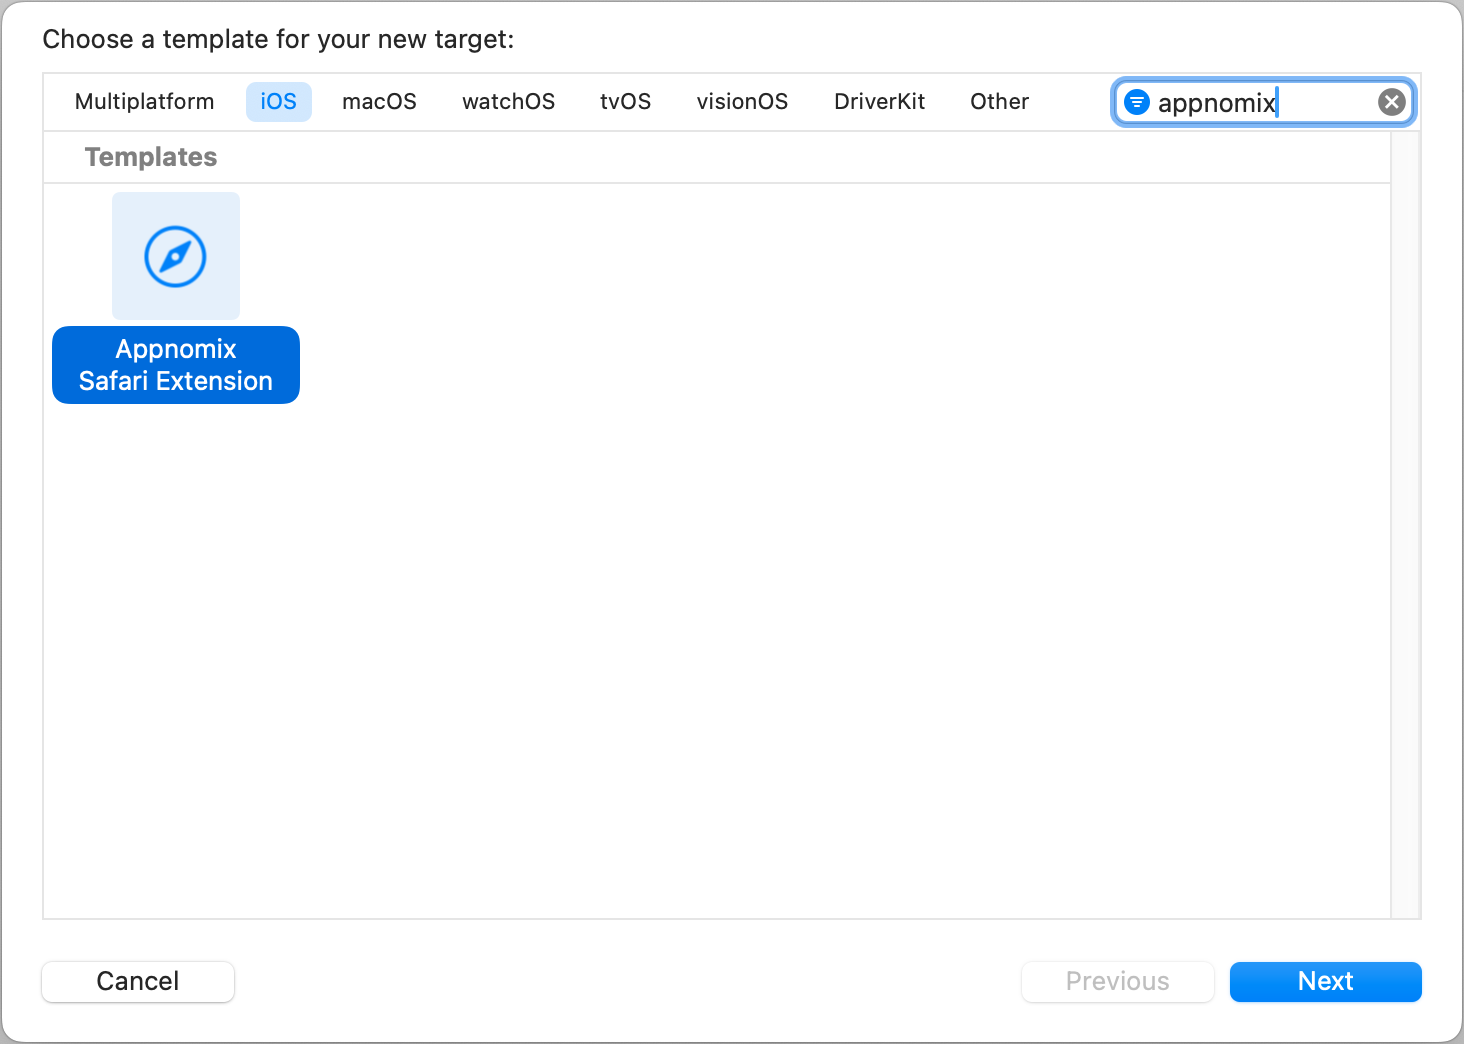
2. Add New Target
Add New Target to your project, using Appnomix Safari Extension template (see screenshots below).
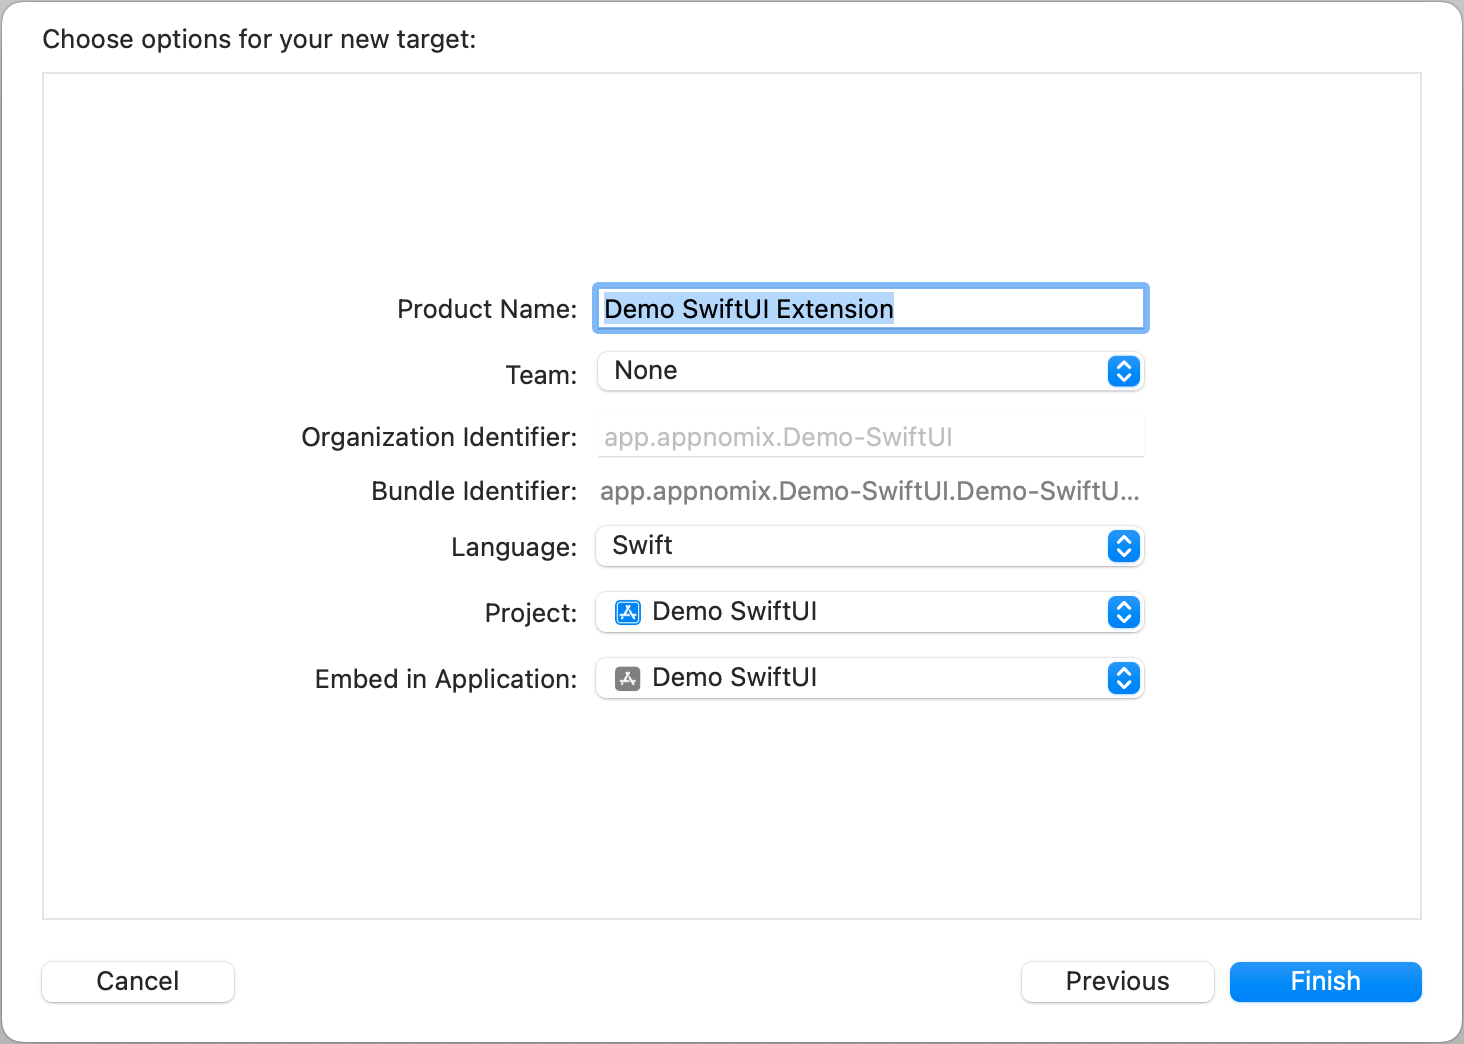
- The new target name should be
[Your Product] Extension
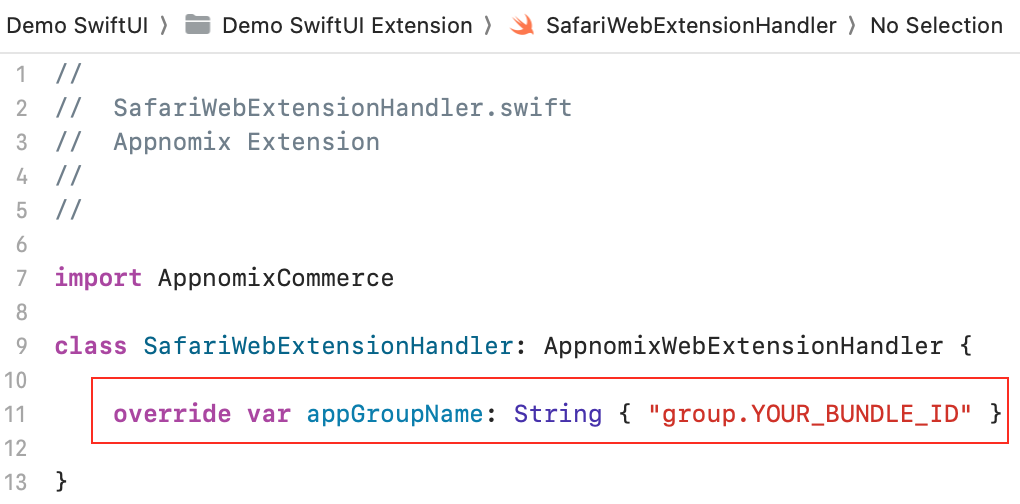
- Update the extension's name and description by editing the
messages.jsonfiles located atResources/_locales/{lang}/messages.json. - Set your App Group Name to SafariWebExtensionHandler.swift file:
- Replace the required logos in the
Resources/imagesfolder, ensuring the file names remain unchanged.
SDK Configuration
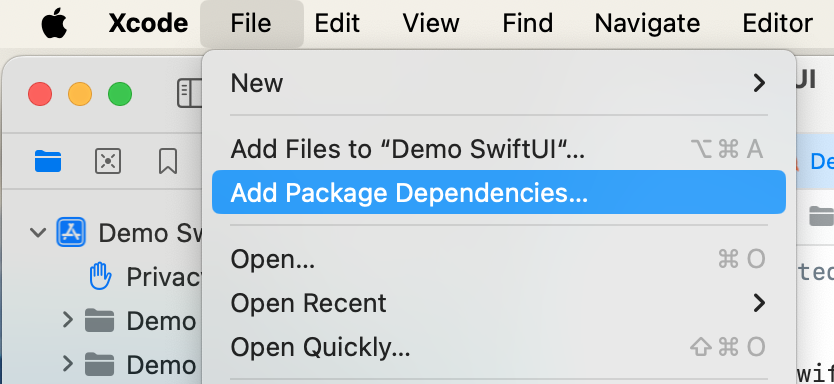
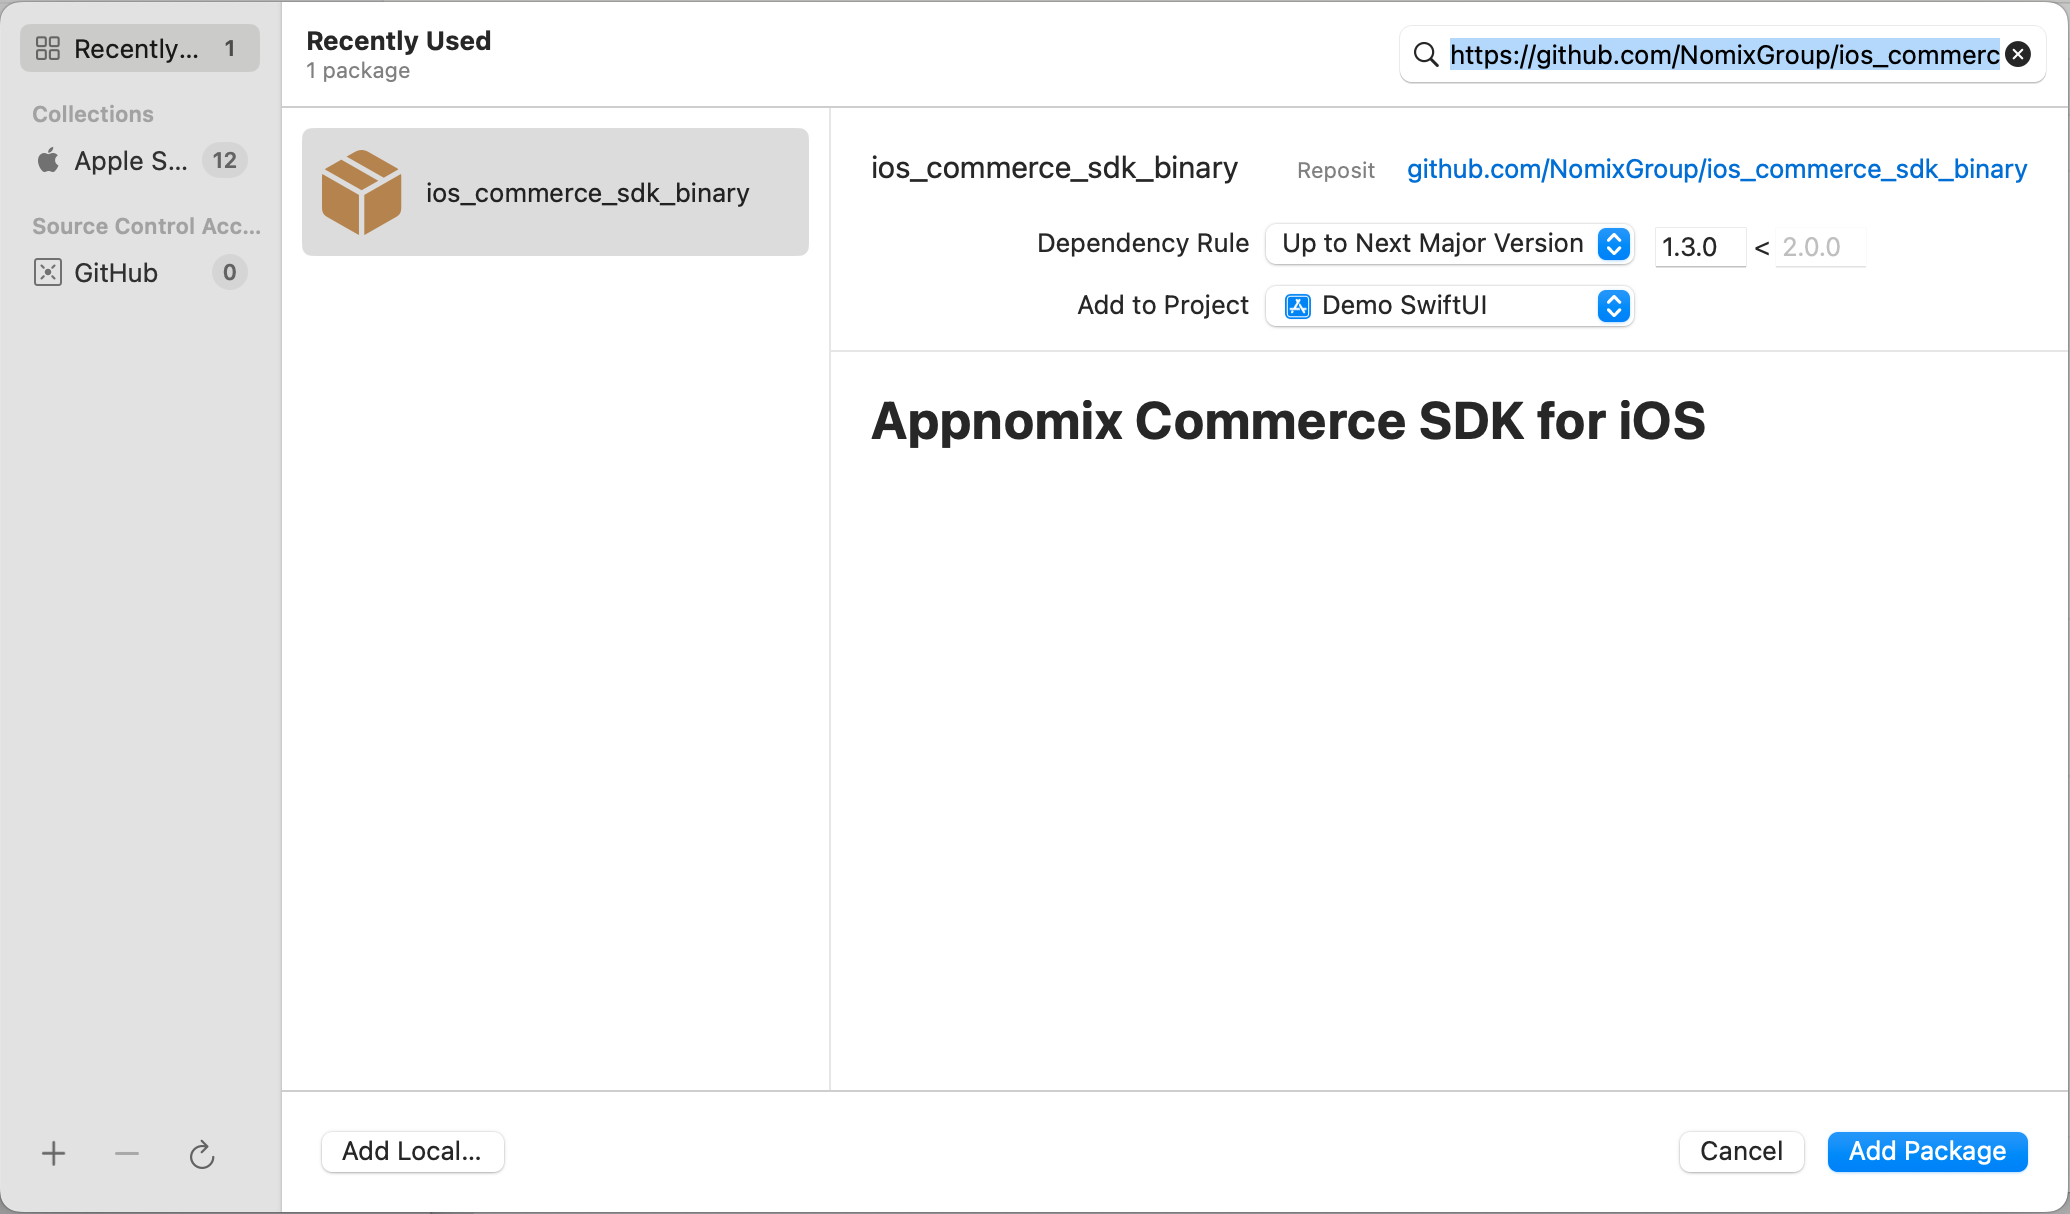
1. Add the SDK to Your Project
Add the SDK via Swift Package Manager by including the GitHub package in your project.
- Use this source:
https://github.com/NomixGroup/ios_commerce_sdk_binary/ - Make sure you select Dependency Rule: Up to Next Major Version
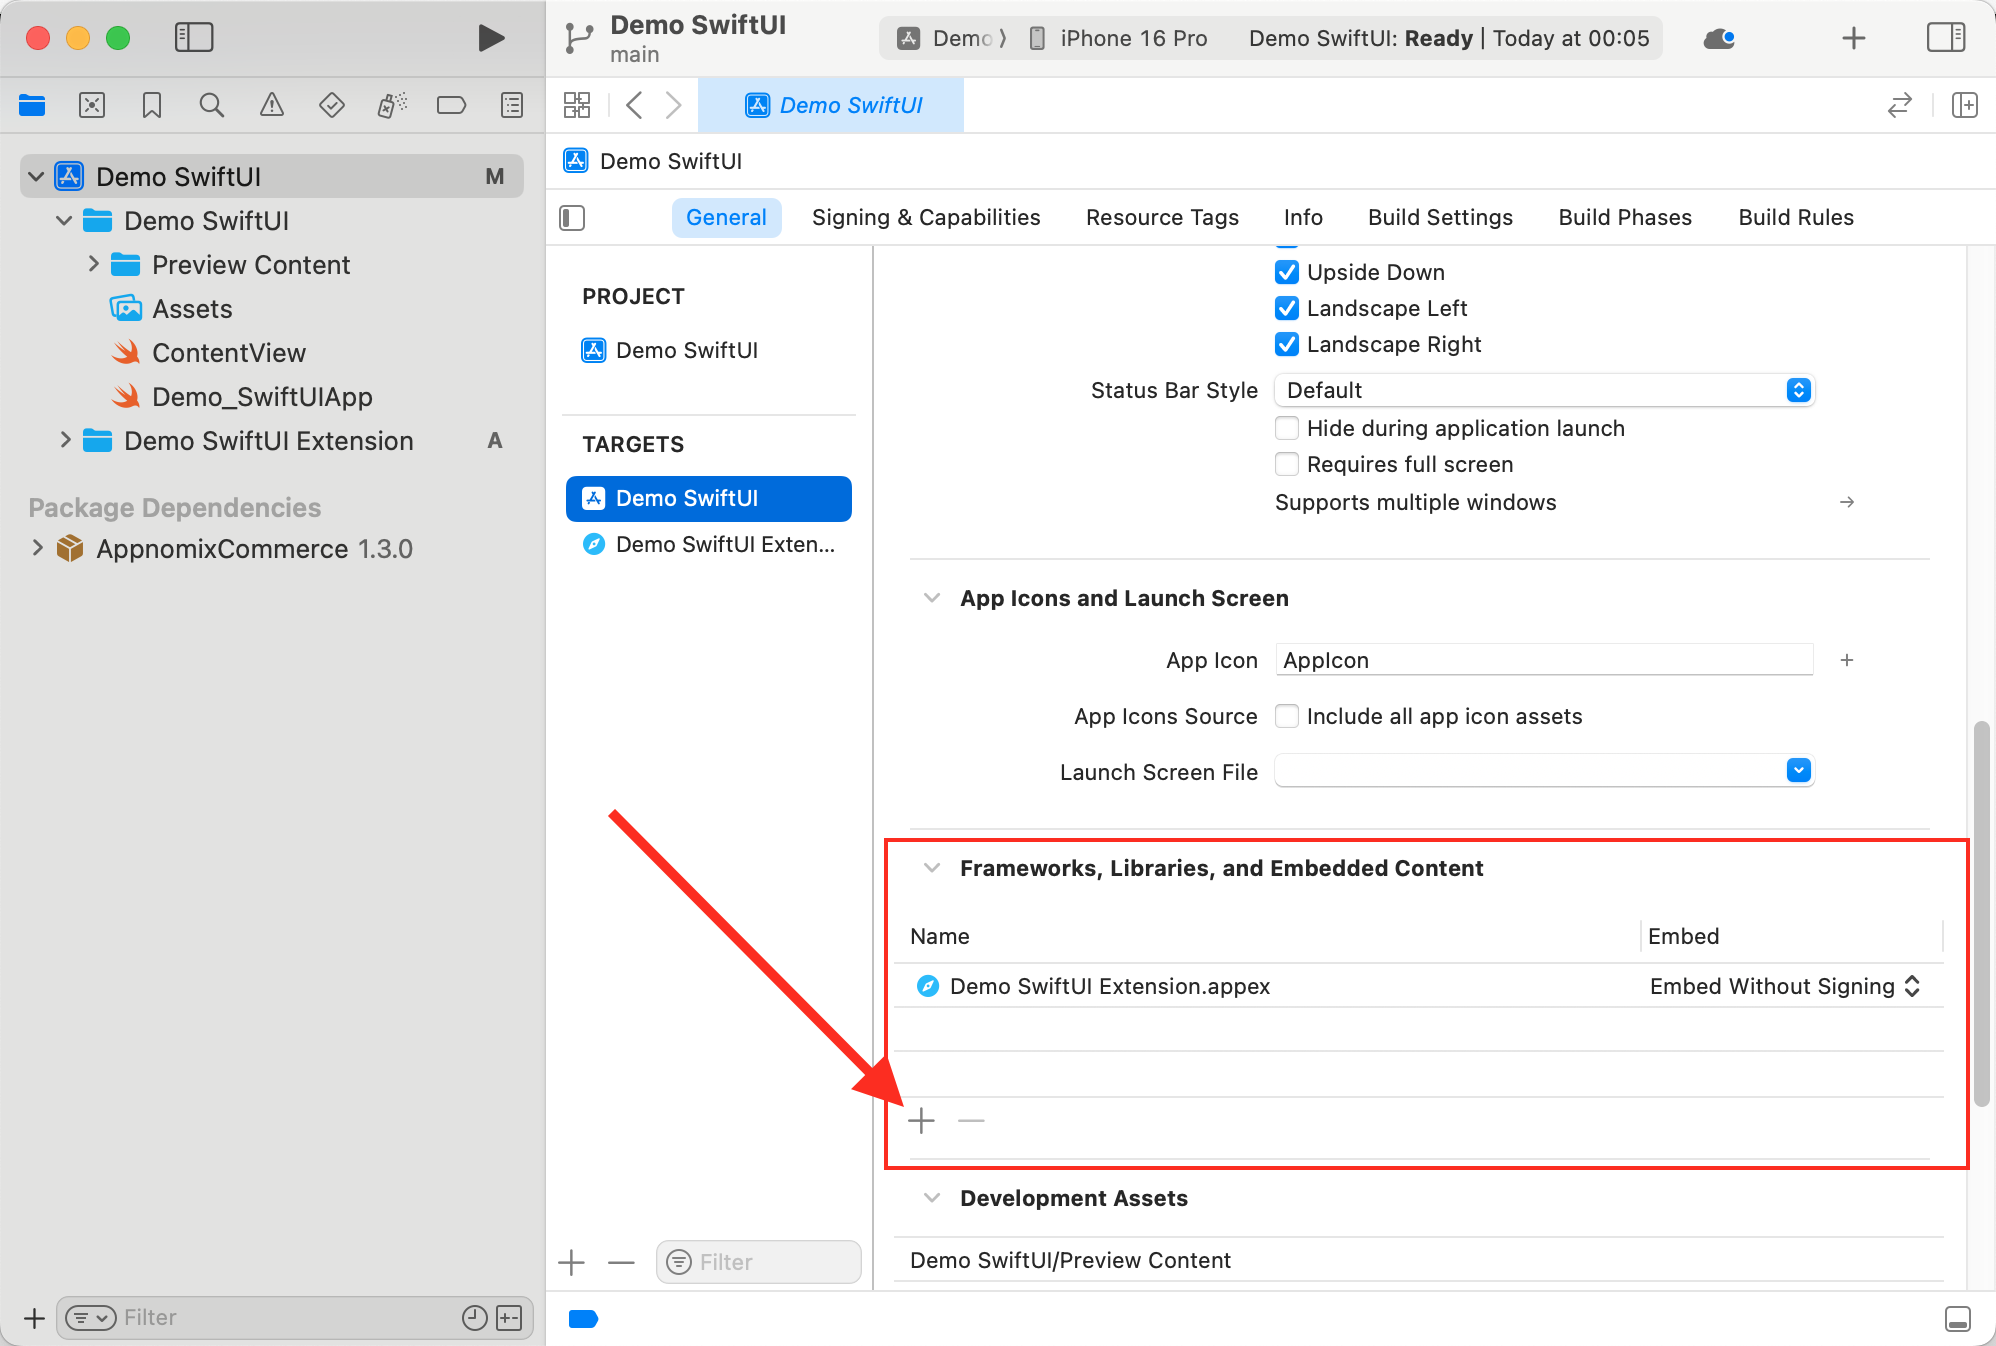
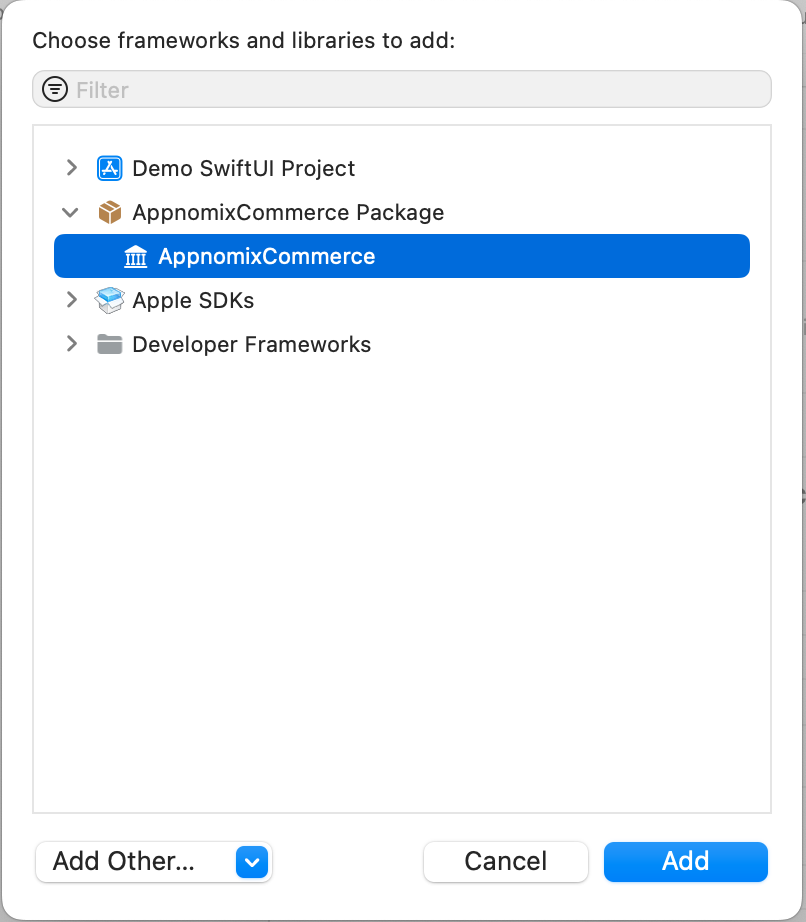
2. Link AppnomixCommerce Framework to Targets
Link AppnomixCommerce library to your main app target and the new created Extension target.
- Make sure you add the library for both targets: Your App and Safari Extension
Starting the SDK
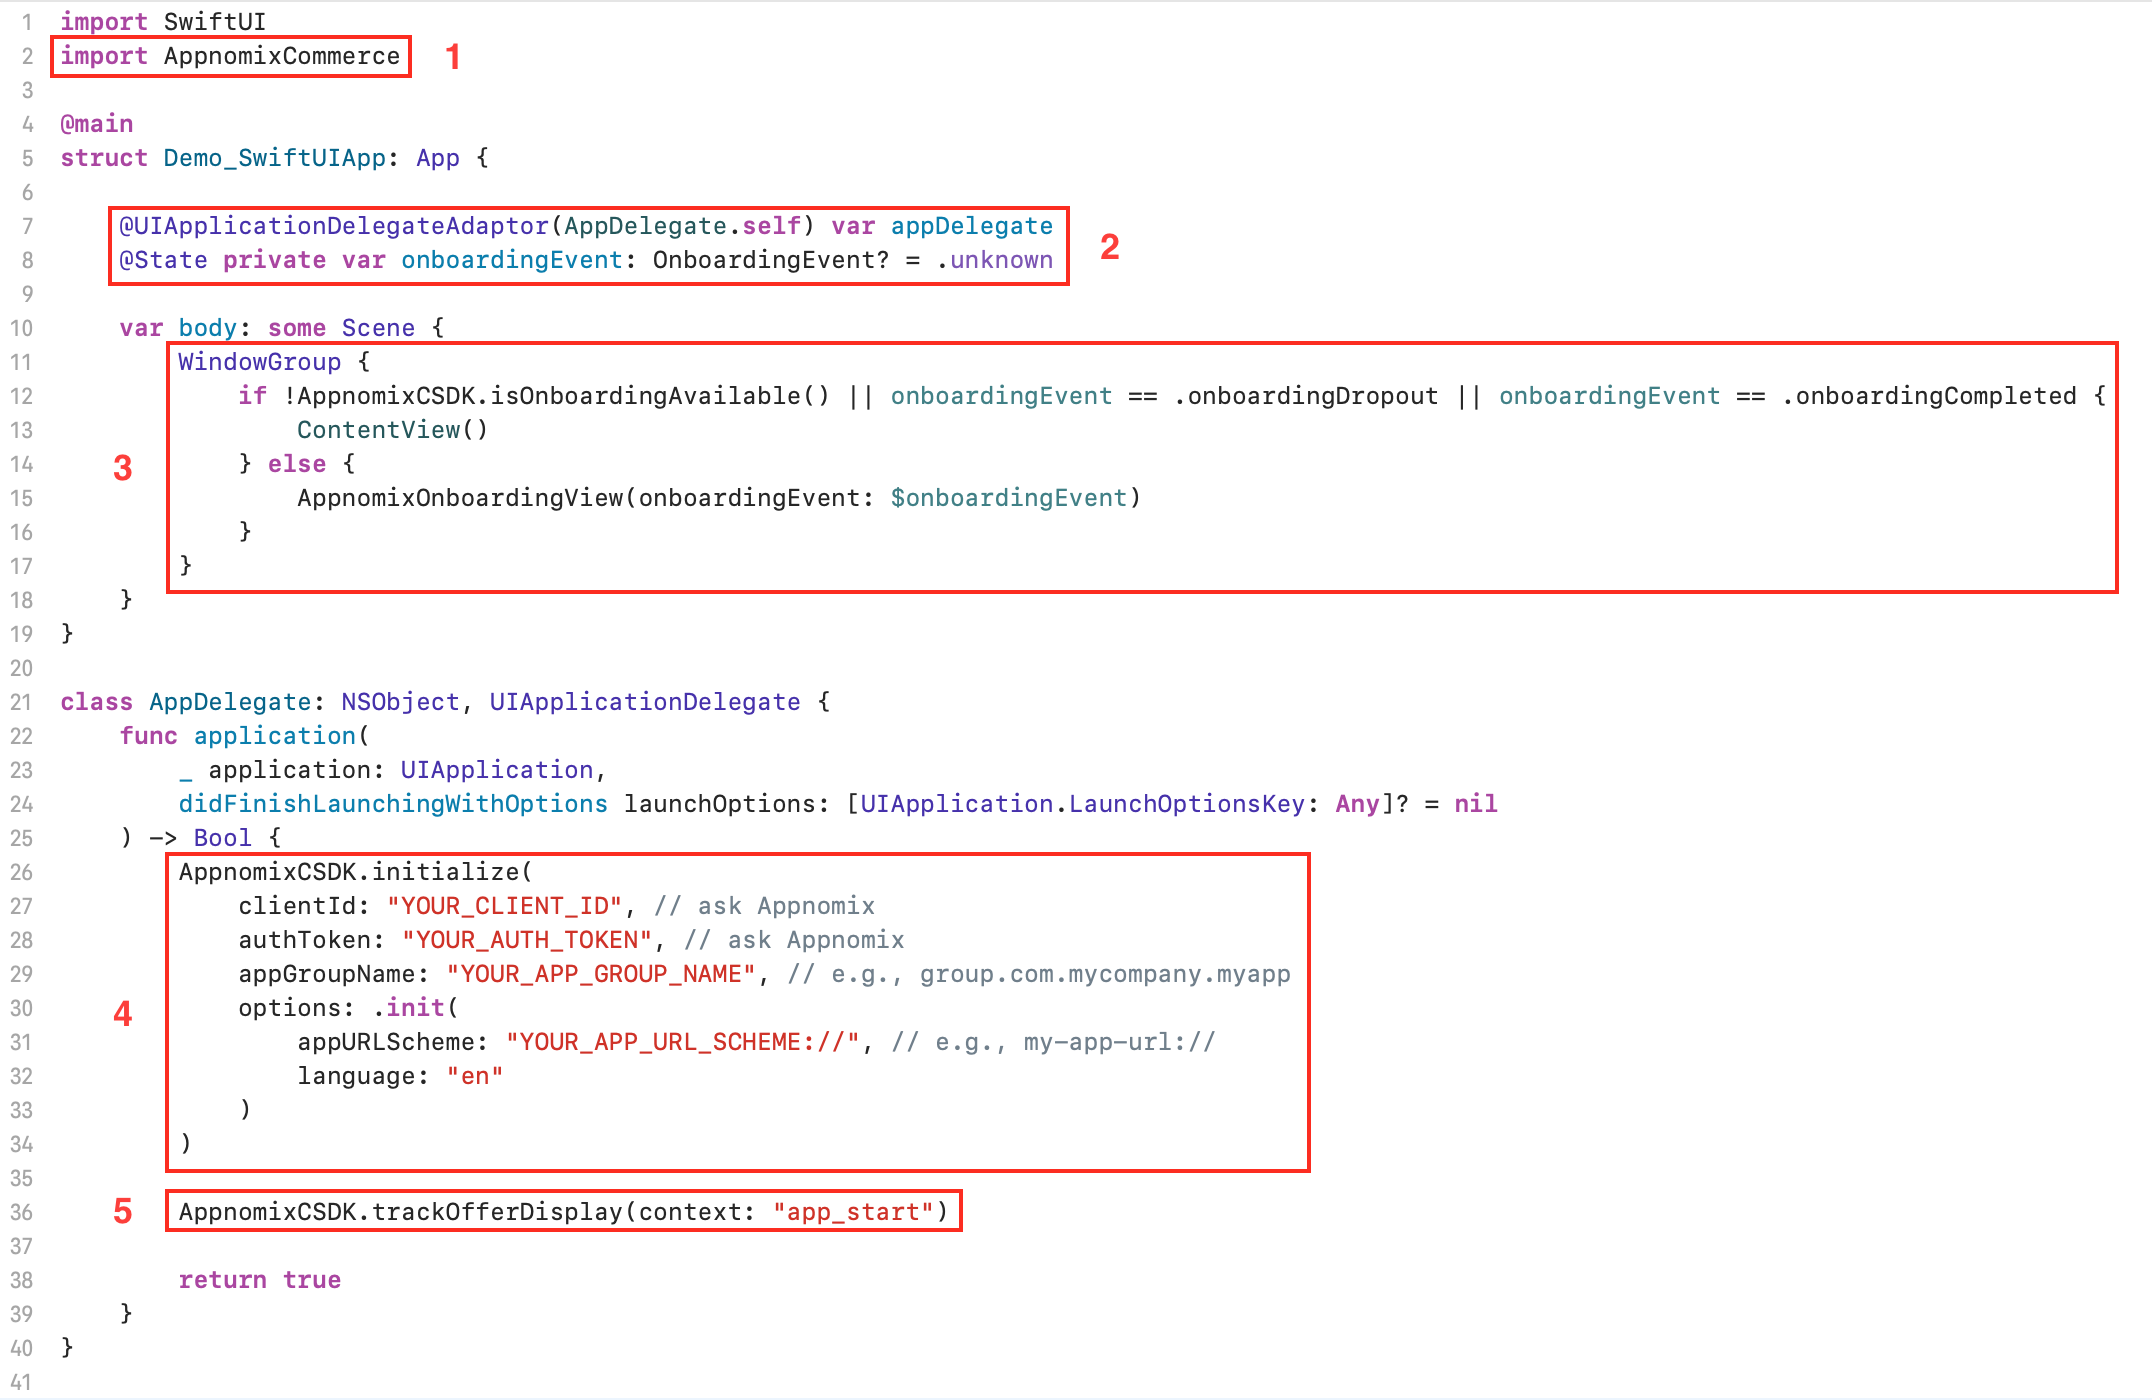
To integrate AppnomixCommerceSDK, you'll need to update your code in four key areas:
- Import the
AppnomixCommerce. - Ensure the
AppDelegateand theonboardingEventvariable are properly defined. - Integrate the
AppnomixOnboardingViewscreen to boost the adoption rate of the extension. - Add the
AppnomixCSDK.initializefunction to yourAppDelegateas an initializer and adjust your data setup accordingly:- Obtain
YOUR_CLIENT_IDandYOUR_AUTH_TOKENby contacting [email protected]. appGroupName(required) Set the App Group name to enable shared data between the app and the extension.- Important note: To ensure that your Safari extension operates effectively, you must activate the App Groups capability for both your app and the extension's targets. You can do this by following the steps outlined here: Configuring App Groups.
appURLScheme(optional) Set the custom URL scheme of your app.- Learn how to define a custom URL scheme for your app by visiting: Defining a Custom URL Scheme for Your App.
- Obtain
- Call the
AppnomixCSDK.trackOfferDisplayfunction whenever the CTA is displayed, as described in the API Reference.
Sample Code
You can use the code below, to copy and adapt to your application code.
import SwiftUI

import AppnomixCommerce

@main
struct Demo_SwiftUIApp: App {

    @UIApplicationDelegateAdaptor(AppDelegate.self) var appDelegate
    @State private var onboardingEvent: OnboardingEvent? = .unknown

    var body: some Scene {
        WindowGroup {
            if !AppnomixCSDK.isOnboardingAvailable() || onboardingEvent == .onboardingDropout || onboardingEvent == .onboardingCompleted {
                ContentView()
            } else {
                AppnomixOnboardingView(onboardingEvent: $onboardingEvent)
            }
        }
    }
}

class AppDelegate: NSObject, UIApplicationDelegate {
    func application(
        _ application: UIApplication,
        didFinishLaunchingWithOptions launchOptions: [UIApplication.LaunchOptionsKey: Any]? = nil
    ) -> Bool {
        AppnomixCSDK.initialize(
            clientId: "YOUR_CLIENT_ID", // ask Appnomix
            authToken: "YOUR_AUTH_TOKEN", // ask Appnomix
            appGroupName: "YOUR_APP_GROUP_NAME", // e.g., group.com.mycompany.myapp
            options: .init(
                appURLScheme: "" // e.g., my-app-url://
            )
        )
        AppnomixCSDK.trackOfferDisplay(context: "app_start")

        return true
    }
}
Updating the Safari Extension
- For Automated Xcode Setup refer to the simplified instructions available here.
- For Manual instructions follow the steps described below:
- Download and extract the latest zip file provided in the Safari Extension.
- Open Finder to access the folder of your Safari Extension within your Xcode project (e.g.
[Your Product] Extension) - Make sure you backup your customized files:
Resources/_locales.Resources/imagesSafariWebExtensionHandler.swift
- Replace the contents of the
Appnomix Extensionwith the folder downloaded in step 1. - Copy the backed-up files from step 3 back to their respective locations.
Event Tracking
Tracking Offer Display
Call the AppnomixCSDK.trackOfferDisplay function whenever the CTA is displayed to your users. The function accepts a string parameter representing the context in which the offer was shown, such as "home screen", "special offers", "level complete", or "daily rewards" based on what's relevant to your app.
AppnomixCSDK.trackOfferDisplay(context: "home_screen")Installation Verification
To detect successful installation and track it, use AppnomixCSDK.isExtensionInstalled() which returns true if extension usage was detected in the last 14 days.
if AppnomixCSDK.isExtensionInstalled() {
    // Extension is active
}
Event Listeners
The OnboardingEvent (refer to the code snippet above) allows you to execute custom actions at each stage of the onboarding process and track a user's progress through the onboarding flow:
OnboardingEvent.onboardingStarted- Triggered when the onboarding screen is shownOnboardingEvent.onboardingDropout- Triggered if onboarding is exited earlyOnboardingEvent.onboardingCompleted- Triggered when onboarding completes and extension is installed
Customization
UI Customization
You can customize the colors on the onboarding screen by configuring and adding the AppnomixCustomizationPoints.json file to your project.
Language Selection
The SDK's initialize function accepts a language parameter using ISO 639-1 language codes. Choose the language for the UI use en for English, de for German, or leave empty to default to the system language.
AppnomixCSDK.initialize(
    clientId: "YOUR_CLIENT_ID",
    authToken: "YOUR_AUTH_TOKEN",
    appGroupName: "YOUR_APP_GROUP_NAME",
    options: .init(
        appURLScheme: "",
        language: "en" // available options: "en", "de", or empty for system language
    )
)
API Reference
Functions
| Function | Parameters | Returns | Description |
|---|---|---|---|
AppnomixCSDK.initialize() | clientId: StringauthToken: StringappGroupName: Stringoptions: AppnomixCSDK.Options? | Void | Initializes the SDK using the provided authentication details and configuration options. |
AppnomixCSDK.trackOfferDisplay | context: String - A string identifying the screen or situation where the offer is displayed. | Void | Tracks when the Appnomix offer is displayed to the user. Call this function when showing the CTA to access the offer. |
AppnomixCSDK.isExtensionInstalled() | None | Bool | Returns true if extension usage was detected in the last 14 days. |
AppnomixCSDK.isOnboardingAvailable() | None | Bool | Checks if the onboarding configuration is initialized, and the onboarding can be started. |
Events
| Event | Description |
|---|---|
OnboardingEvent.onboardingStarted | Triggered when the onboarding screen is shown. |
OnboardingEvent.onboardingDropout | Triggered if onboarding is exited early. |
OnboardingEvent.onboardingCompleted | Triggered when onboarding completes and extension is installed. |
Testing & Support
Attribution Testing
To ensure that the SDK integration is working correctly and that attribution is being tracked properly, please contact us at [email protected]. We can verify that:
- Events are being tracked correctly
- User attribution is working as expected
- The integration is configured properly
What's Next
If the integration is successful and the user has enabled the Safari Extension, when visiting supported websites, users will see:
- Automatic coupon detection and application
- Product price comparison (v2.0+)
- Product availability tracking (v2.0+)
- Deal notifications
Troubleshooting
Common Issues
If you encounter issues during integration, check the following:
-
Extension not appearing in Safari
- Verify that the App Group is configured for both your app and extension targets
- Ensure the extension target is included in your build scheme
- Check that the user has completed the onboarding flow
-
Onboarding not showing
- Verify
AppnomixCSDK.isOnboardingAvailable()returnstrue - Check that your
clientIdandauthTokenare correct - Ensure
AppnomixCSDK.initialize()is called before attempting to show onboarding
- Verify
-
Events not tracking
- Verify that
trackOfferDisplayis being called with a valid context string - Check that the SDK has been initialized before calling tracking functions
- Contact [email protected] to verify server-side tracking
- Verify that
Error Codes
The SDK logs error codes to help diagnose integration issues. All errors are logged to the console, and critical errors are reported to Appnomix servers to help diagnose integration issues.
SDK Initialization Errors (E101-E110)
These errors occur when the SDK fails to initialize properly.
| Error Code | Message | Solution |
|---|---|---|
E101 | SDK init failed: missing clientId or authToken | Ensure both clientId and authToken are provided to initialize() |
E102 | SDK init: Config request timed out | Check your network connection; the SDK will retry automatically |
E103 | Config received but API usage is blocked remotely | Contact [email protected] - your account may be need to be setup |
E104 | SDK init: Received malformed config | Contact [email protected] with error details |
E110 | SDK init failed: App Group not accessible - check entitlements and provisioning profile | Check Configuring App Groups |
Onboarding Errors (E201-E205)
These errors occur during the onboarding flow when users are setting up the Safari Extension.
| Error Code | Message | Solution |
|---|---|---|
E201 | Onboarding failed to open: missing clientId/authToken | Ensure initialize() was called before showing AppnomixOnboardingView |
E202 | Onboarding failed to open: extension already enabled | The Safari Extension is already enabled - no action needed |
E203 | Onboarding opened again: already completed | User has already completed onboarding - consider checking isOnboardingAvailable() first |
E204 | Onboarding failed to open: SDK config not received | Wait for SDK initialization to complete before showing onboarding |
E205 | Onboarding failed to open: SDK API disabled remotely | Contact [email protected] - your account may be need to be setup |
Network & Data Errors (E400-E404)
These errors occur during network requests or data processing.
| Error Code | Message | Solution |
|---|---|---|
E400 | Data: Bad request | Check SDK version compatibility; contact [email protected] if issue persists |
E401 | Network: Request timeout | Check network connectivity; the SDK will retry automatically |
E402 | Data: Deserialization error | Contact [email protected] - possible API change |
E403 | Data: Max retry reached | Network issue preventing data sync; will retry on next app launch |
E404 | Validation: validation failed | Contact [email protected] with the full error message including validation details |
Note: For any errors not listed here or if you need additional assistance, please contact [email protected] with the error code and relevant details from your logs.
Privacy & Permissions
API Usage Declaration
Starting May 1, 2024, Apple mandates that apps utilizing APIs requiring justification must declare them in their app's privacy manifest. Here are the steps to include or update your privacy manifest with the APIs utilized by the Appnomix Extension.
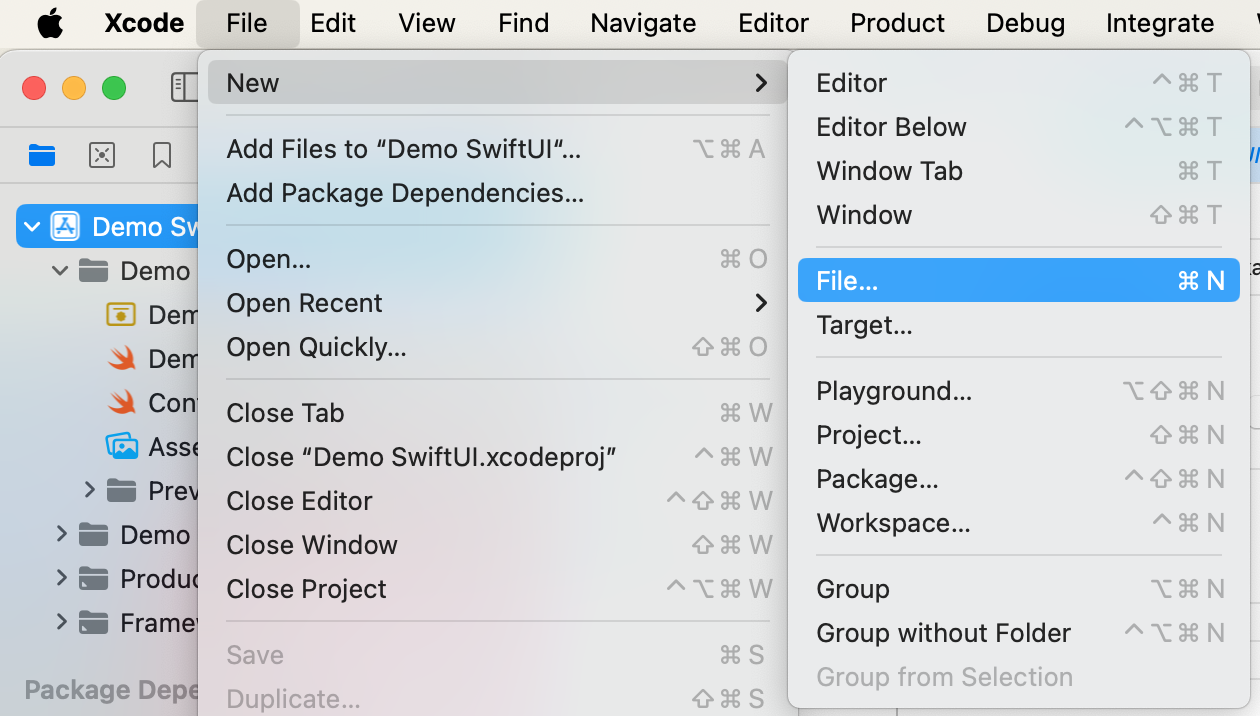
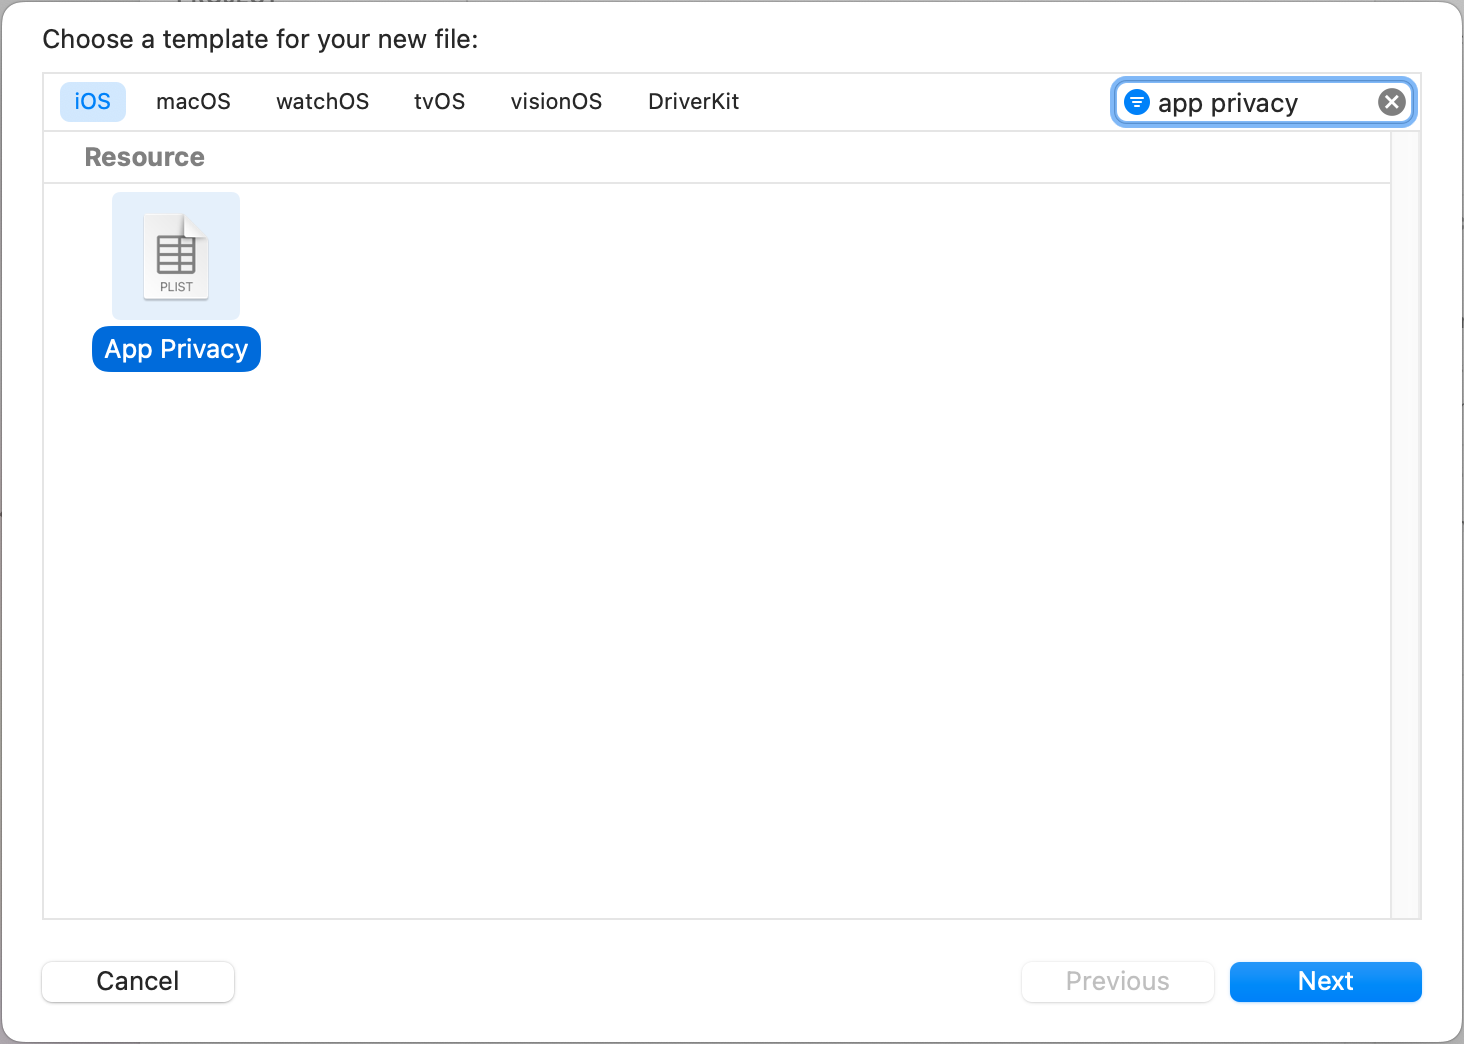
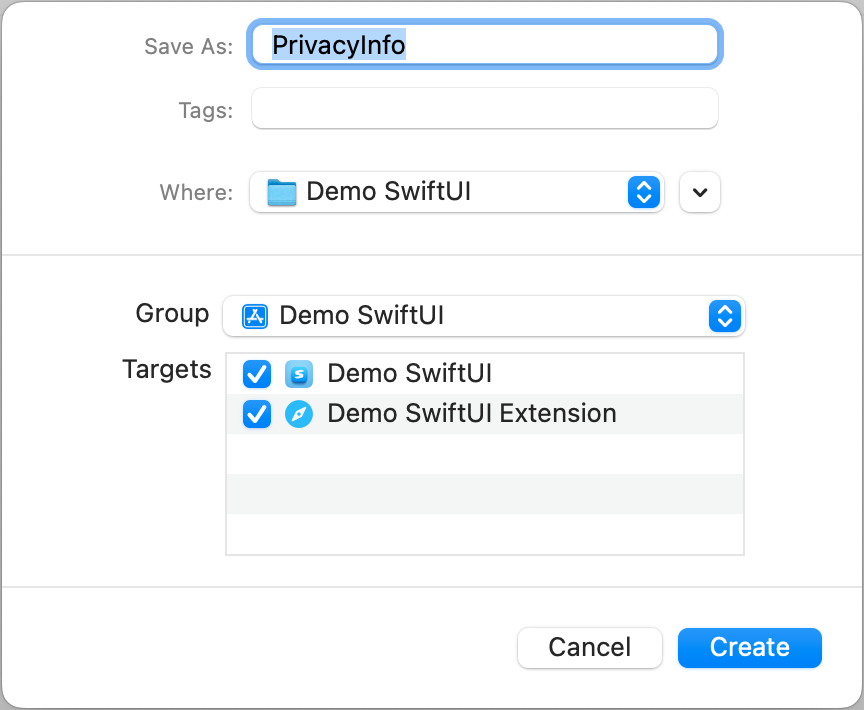
- Add the
PrivacyInfo.xcprivacyfile to your Xcode project by following the illustrated steps below:
- Include the entries detailed below as API types and their corresponding reasons:
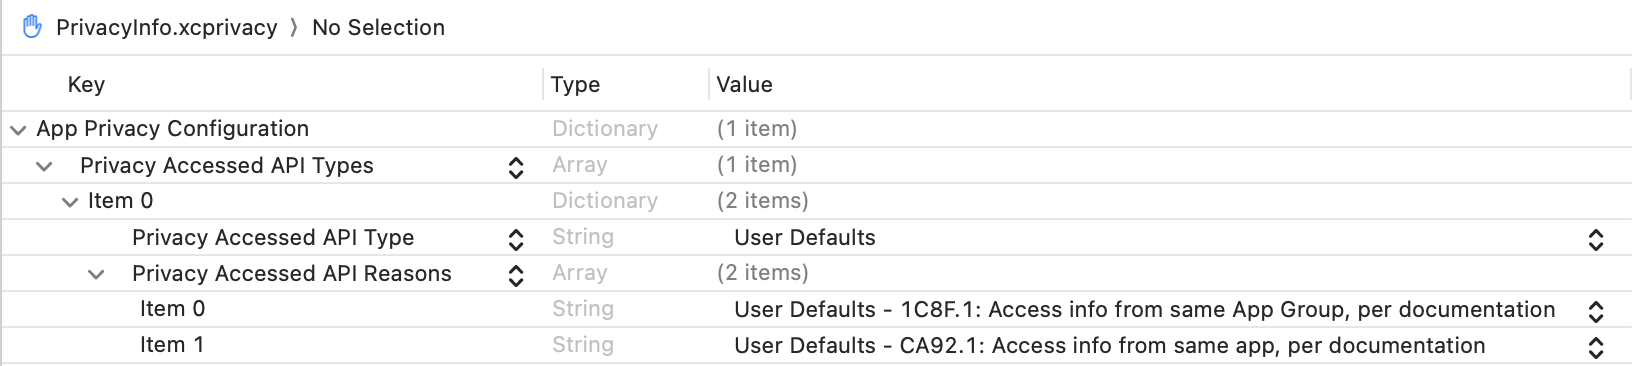
- Here is an example of how the
PrivacyInfo.xcprivacyfile should look:
<?xml version="1.0" encoding="UTF-8"?>

<!DOCTYPE plist PUBLIC "-//Apple//DTD PLIST 1.0//EN" "http://www.apple.com/DTDs/PropertyList-1.0.dtd">

<plist version="1.0">
<dict>
	<key>NSPrivacyAccessedAPITypes</key>
	<array>
		<dict>
			<key>NSPrivacyAccessedAPIType</key>
			<string>NSPrivacyAccessedAPICategoryUserDefaults</string>
			<key>NSPrivacyAccessedAPITypeReasons</key>
			<array>
				<string>1C8F.1</string>
				<string>CA92.1</string>
			</array>
		</dict>
	</array>
</dict>
</plist>
Automated Xcode Setup
The SetupXcode.sh script helps you integrate the Safari extension into your Xcode project and automatically configures all necessary settings for SDK. Just follow these simple steps:
- Download and unzip SetupXcode.sh.zip file into the same folder as your Xcode project.
- Place your logo image as
logo.pngin the same folder asSetupXcode.sh. - Open
SetupXcode.shin a text editor and update theAPP_GROUPS_NAMEvariable with your app group identifier. - Open Terminal, navigate to the folder, and run the script:
./SetupXcode.shWishing you a smooth integration!
Updated 21 days ago